How to Fix Spell Check Not Working in Word
How to Fix Spell Check Not Working in Word: Microsoft Word is one of the most used applications in offices and homes. Whether you’re a student, professional, artist, businessman, or anybody else, you definitely use it to write articles, official reports, letters, notes, etc. Microsoft Word simplifies the writing tasks by its spell check feature. While writing on Word, users generally make spelling and grammatical errors.
Such an error is quite embarrassing and not acceptable in a professional scenario. The spelling and grammar checking tool within MS Word helps to identify spelling errors and suggest the correct spelling that helps you from not being embarrassed. In this guide, we will show you easiest ways to fix spell check not working in Word.
Table of Contents
Reasons for Spelling and Grammar Check Not Working in MS Word
Though the spelling and grammar check tool works effectively, sometimes it may stop working. Word does not display any message that spell check is not working. Sometimes, it may indicate an error message saying “Spelling and grammar check is complete” without pointing out any errors.
This indicates to the user that the spelling and grammar checking tool is not functioning.
There are some common reasons for the non-operation of Word’s spell check such as change of settings, issues in the Word template, or disabled language settings. If your spell check is not working, you can fix it with some simple troubleshooting options.
Causes and Solutions for Spell Check Not Working in Word
1. When the spell check is not working on a specific document
It may happen that the spell check may not work on a single Word document when it is working on other documents. When it stops working on a particular document formatting or language, try the method given below.
Solution 1- Verify language and Spell check options
- Open the document facing spell check errors.
- Press Control+A to select the full text.
- Under the Review tab, select Language > Set Proofing Language…
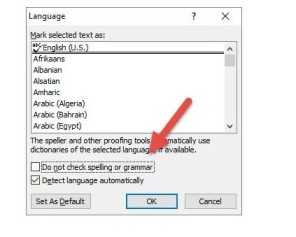
- Check the Language dialog, and ensure correct language is selected.
- Make sure to verify that the checkbox titled “Do not check spelling or grammar” is unchecked.
- Click Ok.
- Recheck the document with the spell-check tool.
After following the above steps, a message may appear on the screen that says that a portion of the text is still marked as “Do not check spelling or grammar”.
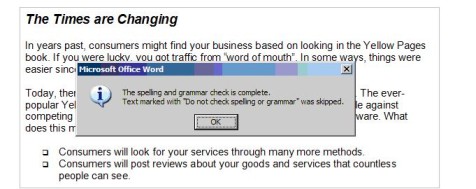
To fix this issue, follow the given steps.
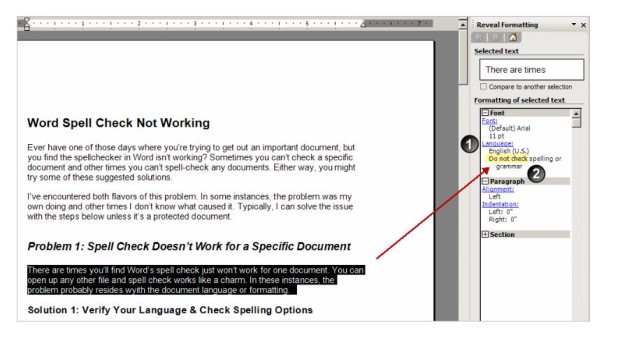
- Try to find a paragraph with misspelling, highlight, and press Shift+F1. A pane opens titled Reveal Formatting from where you can verify the language and whether the spell check is turned off.
- Keep the paragraph highlighted and hyperlink in the Reveal Formatting dialog. A Language dialog shows where you can disable the spelling option.
Solution 2- Check Proofing options to Fix spell checker in word
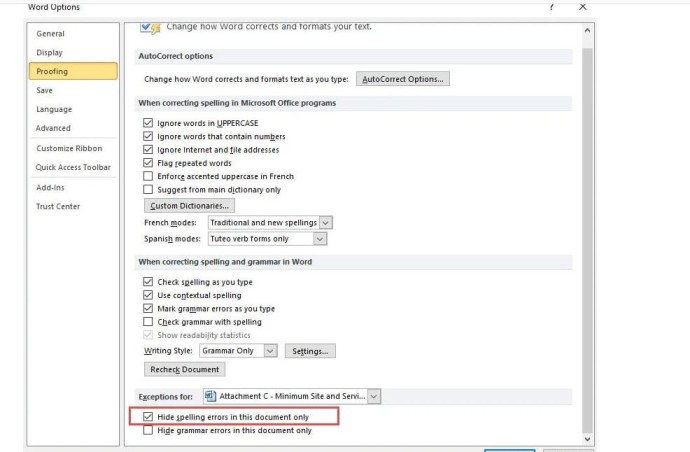
Another very important setting is an option to hide spelling errors in the Word file. The setting is done on a file to file basis.
- Open the File tab, select Options
- Under Word Options window, choose Proofing on the left panel.
- At the bottom, you can find “Exceptions for”
- Check whether the option to hide spelling errors is enabled or not.
- If yes, then untick the box. Click Ok to apply.
2. When the spelling check is not working for any documents
When the spell check is not working for any document, you should try the solutions given below-
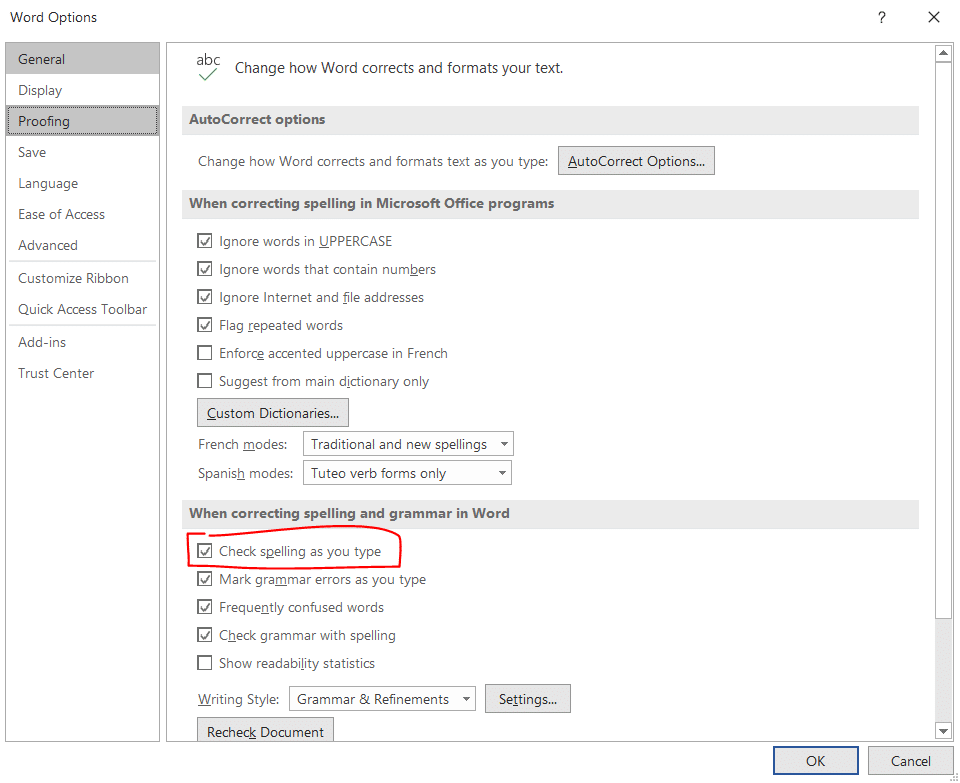
Method 1- Verify the feature “Check Spelling as you type”
- Once again, open File > Options.
- Select Proofing from the options on the left pane.
- Tick the checkbox for “Check spelling as you type” and “Mark grammar errors as you type”.
- Click Ok.
Method 2- Verify the feature “Another word add-in”
The spell check may also not work due to another feature “Another word add-in”. To verify, you have to see whether the spell check is working in safe mode or not. Under the safe mode, Microsoft Word works without add-ins.
- Hold the Control key and double-click the Word document.
- When Safe Mode dialog appears, then click Yes.
- Open the existing document.
- Press F7 to run the spelling and grammar check.
Method 3- How to Fix Spell Check Not Working in Word by Renaming the Word Template
Your Word Template may be either in normal.dot or normal.dotm for Word 2007 and newer series. Such files are found in the Microsoft Template folder. To reset to the default settings, rename the template like normalPRV.dot or normalPRV.dotm.
To find the location of the templates, press Windows + R. It opens the Run dialog box where you can type the command.
Method 4- Renaming a Windows Registry Folder
How to rename proofing folder
- Close Word file.
- Press Windows+R.
- As the Run dialog opens, type “Regedit”.
- Click OK.
- In the left pane, move to HKEY_CURRENT_USER >Software>Microsoft>Shared Tools> Proofing
- Right-click on the folder 0
- Select
- Rename the folder as 0
- Close Regedit.
- Restart Word.
3. Fix spell check using 3rd party software
There are so many 3rd party software in market which are able to fix issue spell checker not working, but I highly recommend Tinyspell. Tinyspell is the most trusted spell check application for windows. You can install this application in your PC and fix the issue “Spell check not working”.
Conclusion
Remember that even after trying out all these options, the error still persists, then you can reinstall MS Word. A fresh installation can smooth out all errors. However, keep the reinstall option as a last resort.
Follow Us On:

