
Antimalware Service Executable
The Antimalware Service Executable is a process that has an important role to play in Windows Defender Service which comes with Windows 10. Well, apart from its important role it is also not much known for consuming a lot of processing power of your CPU and is responsible for slowing down the speed of your PC to a greater extent.
Table of Contents
What is antimalware service executable
If you are using Windows Defender to safeguard your computer then
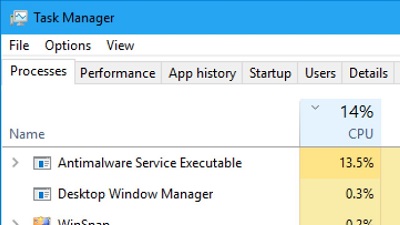
Open – Windows Task Manager (press –Ctrl+Shift+Esc/Start Menu—Task Manager), browse through the background processes list and here you will see a process termed as – Antimalware Service Executable and a file adjacent to it, which is -msmpeng.exe.
msmpeng.exe Antimalware service executable
The process “msmpeng.exe antimalware service executable” lets Windows Defender to constantly keep an eye on your PC for any possible threats and offer constant protection against different cyber attacks of malware attacks. Also, it can lead to consumption of considerable amount of CPU.
It is quite annoying as you can’t disable this crucial feature that is – Windows Defender before installing other IT security solution, thus this is the one thing that causes the issues for your PC performance.
Allow the program work on it and solve the threats and simply perform the steps to avoid the issue before it occurs.
Fix antimalware service executable high memory usage
1. Modify the options for Windows Defender’s scheduling
For many people who face this problem the high memory usage occurred due to Antimalware Service Executable normally takes places when Windows Defender is performing a full scan.
You can modify the schedule for full scan
- Open -Start menu and type – “task scheduler” and then click the very first result to install the program
- To the left in the navigation pane, double click on – Task Scheduler Library. Go ahead and open these folders to move to the following target: Library/Microsoft/Window
- After you open the Windows Defender folder, just double click on – Windows Defender Scheduled Scan, found in middle pane.
- Click the tab – Conditions, here- uncheck all the options and then click – OK. This will automatically clear the scans scheduled.
- In order to safeguard your PC, it is recommended that you should schedule a few new scans, but doing this way we can cut down its influence on the performance of your system. You can do it by double clicking – Windows Defender Scheduled Scan, choose the tab –Triggers and now click – New.
- Make a new schedule for scan which goes with your needs, selecting right options will help you maintain the balance between system performance and protection.
- Repeat the same steps for other 3 services – Windows Defender Cache Maintenance, Windows Defender Verification and Windows Defender Cleanup located in – Library/Microsoft/Windows/Windows Defender
Related: How to disable windows defender in windows 10
2. Check if there are any malware infections
There are possibilities that some malware is making Windows Defender to disturb the performance of your PC.
Perform a full system scan with a secure and reliable anti-malware solution.
Follow Us On:Ajit Yadav
Author Bio: Ajit yadav is a professional blogger and co-founder of WindowsClassroom. He is a software engineer by education and blogger & writer by profession.