

Enable Remote Desktop Windows 10 and How to Use it
How to Enable Remote Desktop Windows 10: RDP that is remote desktop protocol is an excellent feature offered by Windows since its early days of XP launch. It actually simplifies the process of connecting the PC to other devices to extract files or offer PC support. Here you will know how to enable remote desktop windows 10.
You will be able to use many free utilities once you enable the remote connection. If you want to stay completely in Windows environment here is how you can activate the built in utility known as RDP in Windows 10.
Table of Contents
Enable Remote Desktop Windows 10
The prominent feature called RDP is not enabled by default. You need to turn the feature ON. In order to enable RDP windows 1o you can follow the steps given below
- In cortana search – type – remote settings
- Now select- Allow remote access to your computer
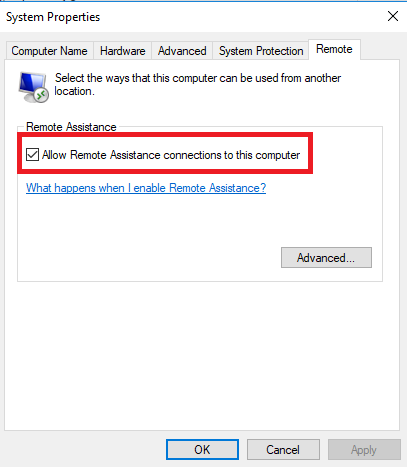
- System properties will be displayed which will open- Remote tab
- Here – select – Allow remote access to your computer and let the box remain checked to get better security via Network Level authentication.
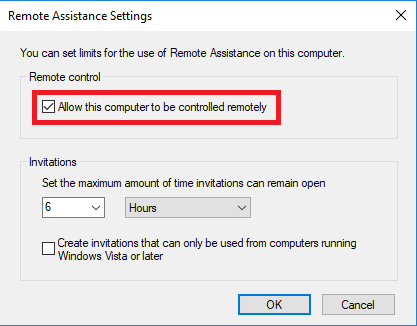
- You also need to enable remote connections (incoming) on the computer you are trying to connect
You may also like: How to setup dual monitor windows 10
Remote into computer
You will get some options on ways to connect remotely to other PC. You can make use of regular desktop app/remote desktop universal app. You can use the app which you can install from the Store. It is compatible with Android and iOS too.
Note: in case there are a number of computers plus devices on the home network then you can use the free utility called Advanced IP scanner.
Now install the app and simply type any name for your computer/device, the hostname/IP address and then choose – Connect
Now type the username and your password that you use for your PC that you are trying to connect into. If you need to remote into quite often then you can check the given box so that your credentials are saved and you can be remembered on your system.
In case you view the message like – Can’t verify the identity of the remote PC then just click on – Go ahead and then Connect and check the box that says – Don’t ask me again for connections to this PC.
You don’t want to be bothered again and again with such message as you know you want to connect it.
That is it. You can now easily start working with remote PC for remote support, configuration or anyway you want to use it.
Also go to
Settings – connection settings (in the app) and then configure – devices, appearance and modify other things you want to.
The above steps are surely going to help you enable remote desktop windows 10. These steps work for Windows 10 pro and if you are using old versions of Windows and want to remote access the Windows PC from tablets or smart phones then you will have to check for relevant tutorials as these steps are not going to work for you.
You can browse the internet to get the right instructions for older version of Windows PC.
Follow Us On:Ajit Yadav
Author Bio: Ajit yadav is a professional blogger and co-founder of WindowsClassroom. He is a software engineer by education and blogger & writer by profession.