How to Disable Windows Defender on Windows 10
How to disable windows defender on windows 10: If you want to disable Windows defender once for all on Windows 10, this article will help you out using different yet easy methods. Windows Defender is basically antivirus software that is offered for with Windows 10 by Microsoft. The idea behind incorporating this software with installation of Windows 10 is to offer the initial stage protection to your PC against viruses, spyware, rootkits and various other malicious programs.
Table of Contents
Ways to Disable Windows Defender on Windows 10
The antivirus starts automatically on your PC, but on the other hand it also gets disabled upon recognizing other antivirus software installed on your PC. Well, Microsoft wants you to start your PC with at least initial protection, which is of course a good idea. In some cases user do not prefer to run antivirus and for such instances, Windows 10 provides the option to help you disable Windows Defender, which is basically a temporary solution. In case you want to disable the Windows Defender permanently read on.
1. Local Group Policy
When you are using Windows 10 and you want to disable Windows Defender on Windows 10 permanently, you can utilize Local Group Policy Editor.
- Press – Windows key+R a shortcut via your keyboard to expand the Run command.
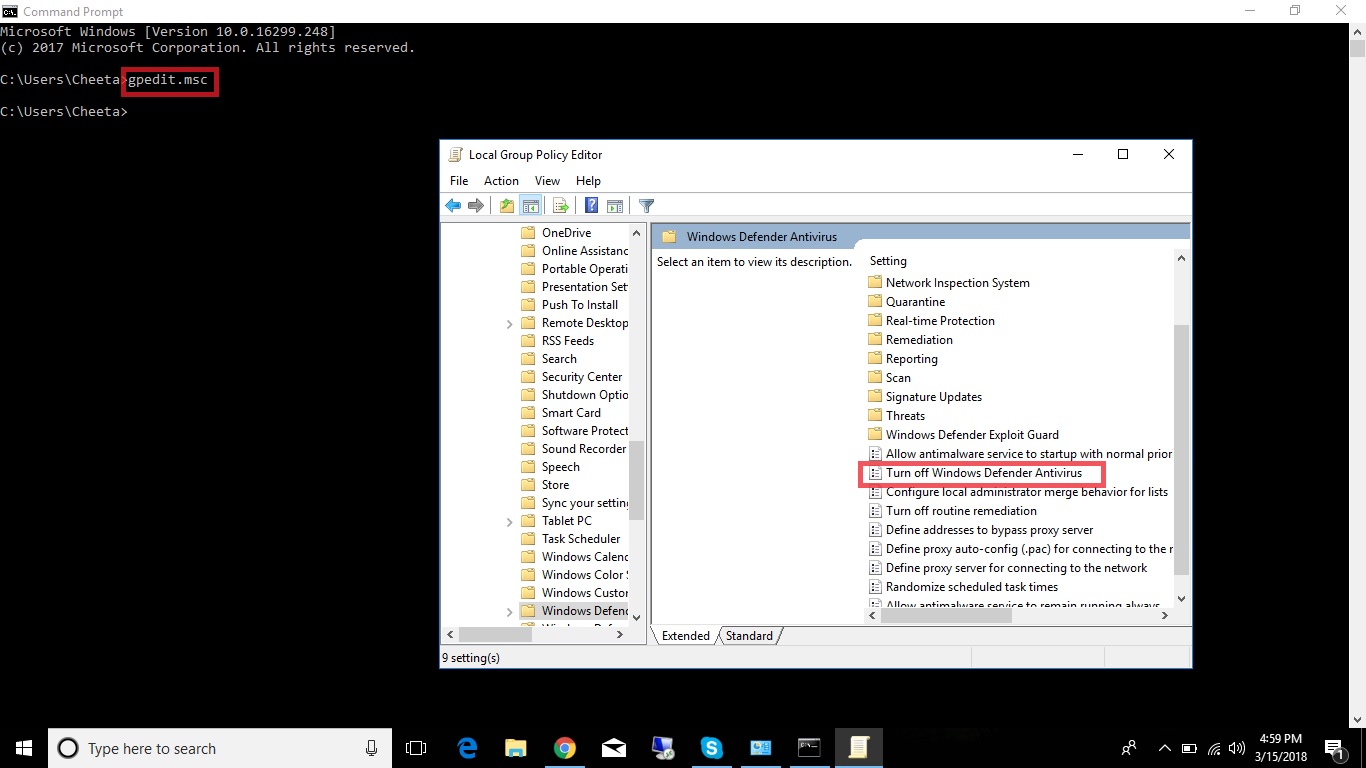
- Now type – gpedit.msc and press OK to open – Local Group Policy Editor
- Navigate the path
Computer Configuration – Administrative Templates – Windows Components – Windows Defender
- To your right – double click on Turn off Windows Defender.
- Choose – Enable in order to disable the Windows Defender
- Click- Apply
- Click – OK
After you carry out the above steps, you will see the icon of Windows Defender continues running in system tray. You can simply delete that icon and reboot your PC.
Also Read: Best ways to remove write protection from your pen drive
2. Use Registry to disable Windows Defender on Windows 10
In some variants of Windows 10 like Windows 10 Home you will not have the option – Local Group Policy Editor available, still you can disable the Windows Defender on windows 10 using Registry. Here is how
Note: Before you jump to using Registry, make sure you do it correctly else it can lead to irreversible issues to your PC. Make sure you back up your data before you try editing the Registry.
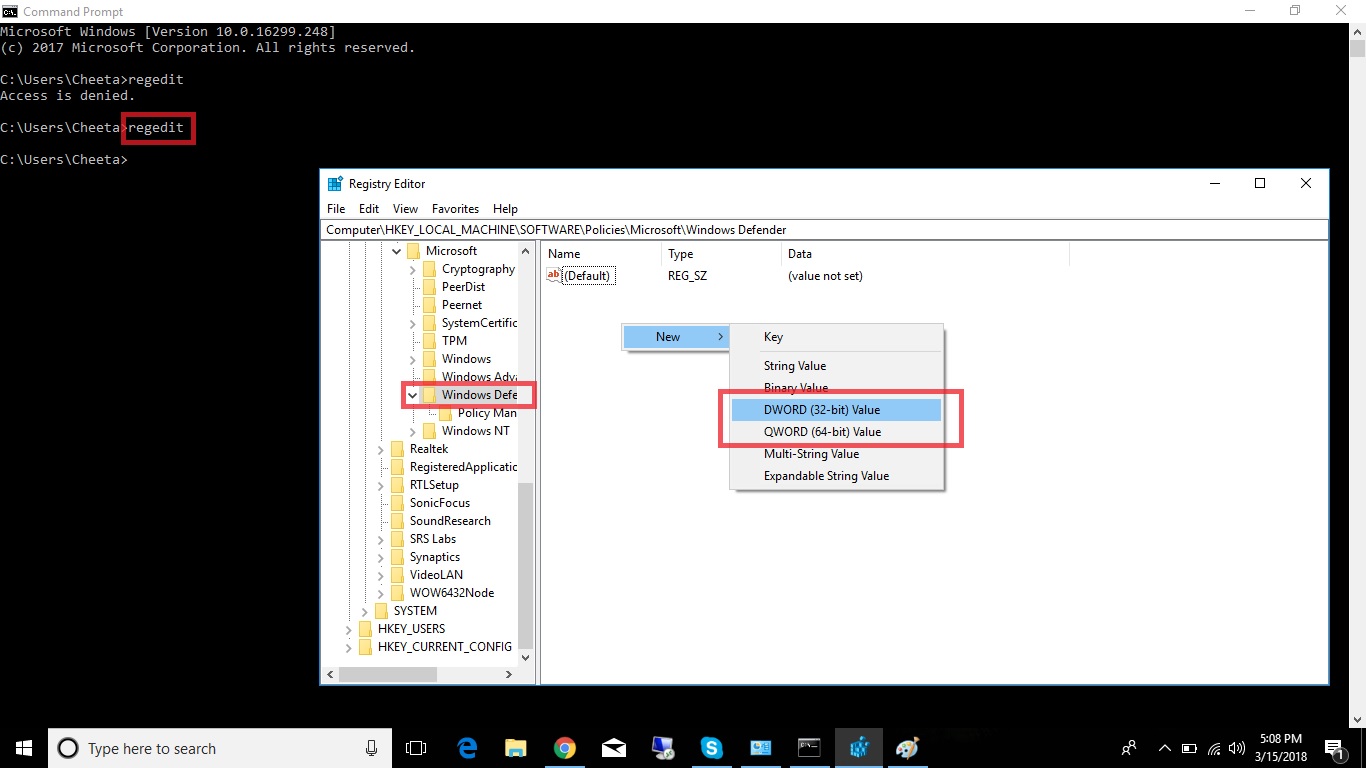
- Press – Windows key + R a shortcut via your keyboard to expand the Run command. Type – regedit and then Click- Ok, which will open the registry.
- Navigate the path as given below
HKEY_LOCAL_MACHINE\SOFTWARE\Policies\Microsoft\Windows Defender
- If you do not find DWORD DisableAntiSpyware, simply right click on an blank spot and select – New and then click – DWORD (32-bit) Value
- Label the key as DisableAntiSpyware.
- Double click– the key that is new and change the value from 0 to 1
- Restart your PC to complete the process
3. Using Settings App
If you wish to temporarily disable Windows Defender on windows 10, follow the below mentioned steps.
- Open – Settings
- Click – Update & Security
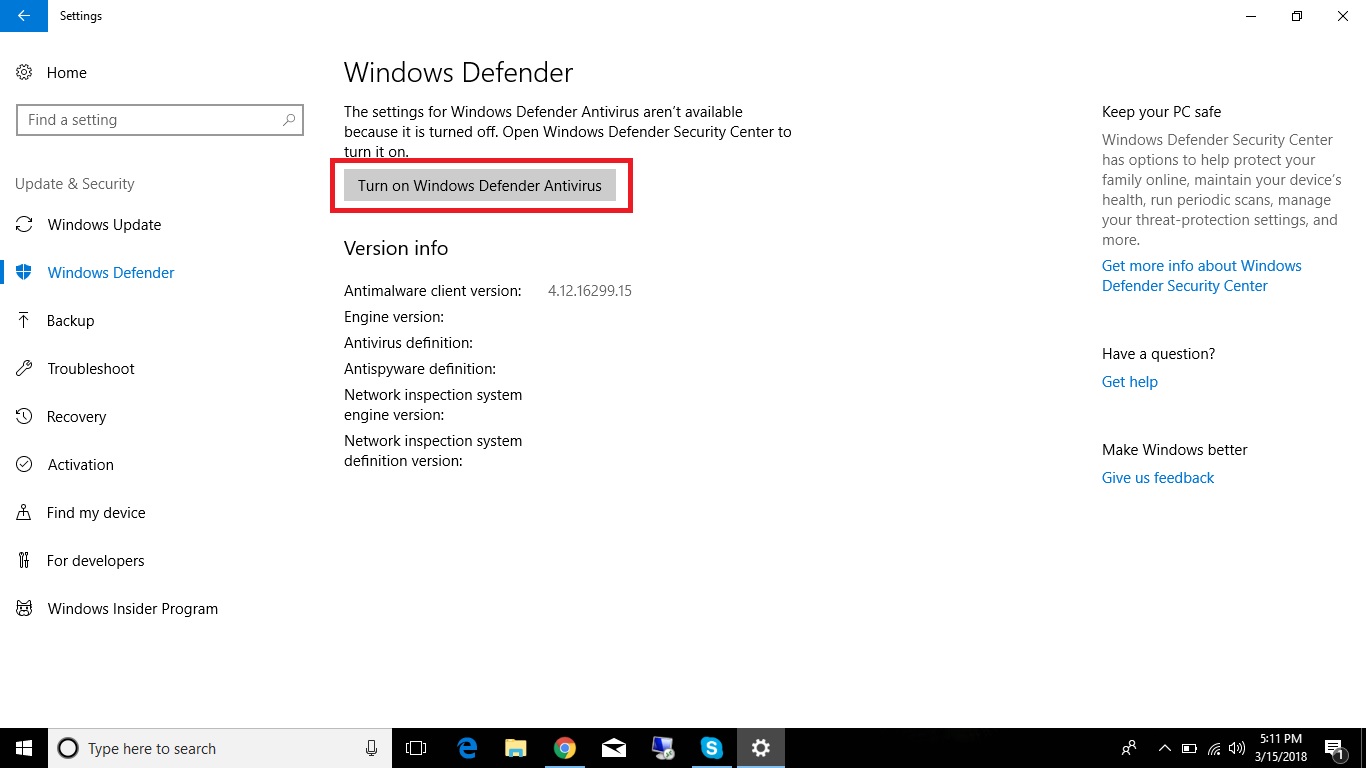
- Click – Windows Defender
- Turn the toggle switch OFF to enable real time protection
Relevant article: How to take a screenshot on windows 8
Follow Us On:


Not anymore. Now with the new builds (Insider) Defender stays on along with your AV you installed.
Hi,
Yes! It stays along with other antuvirus but i meant you can disable it, not uninstall.