
Quick access Windows 10
Table of Contents
What is Quick access Windows 10
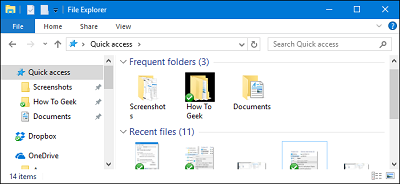
Quick Access is certainly amongst the newest features released in Windows 10. Quick Access is a substitute for Favourites Windows Explorer navigation pane and lets you quickly access your recently accessed files as well as the folders you use frequently.
Quick Access shows up with default settings in Windows explorer’s navigation pane. The list in Quick Access in navigation pane comprise of downloads, desktop, documents and picture including the last four folders being used frequently.
So, when you tap/click the Windows explorer icon from Start menu or the taskbar, Windows 10 starts Quick Access automatically in place of – This PC.
You can see recently used files plus folders that you used frequently in order to help you open them quickly without navigating to the file/folder’s actual location.
Still, there are users who do not wish to view the recently used files or frequently used folders after the Windows explorer starts.
Of course they can avoid seeing this and can switch to This PC via quick access by completing an additional step.
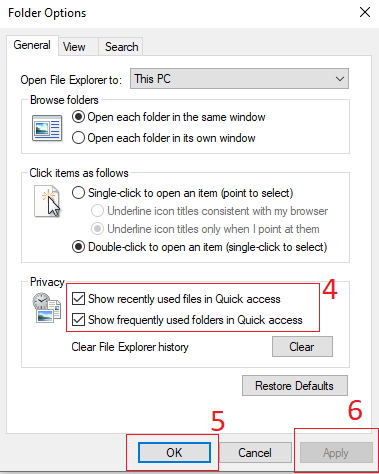
You can find options below Folder Options to avoid showing up frequently used folders & recently used files in your Quick Access. In case you want to disable Quick Access in your Windows 10 in order to access This PC directly by omitting Quick Access, then that is possible too.
This article helps you understands the ways to set up This PC instead of Quick Access by disabling Quick Access in Windows 10
Disable Quick Access in Windows 10
Remember this method will not remove the Quick access utility completely. It will show up in left navigation pane of your Windows explorer.
- Open – Folder Options which you can do by opening – File Explorer,
- Then click – View, click the tiny icon for down arrow located underneath the Options
- Now click on- Change folder and search options to expand – Folder Options dialog.

- Below tab in Folder options – General, choose – This PC through the drop-down box besides
- Open File Explorer to,
- Now click the button – Apply. Done!
Now upon clicking Windows explorer icon This PC will be started in place of Quick Access.
Quick Access windows 10 – Turn it off using Registry
This method allows you to edit the values set as default for the Windows Registry. It is recommended that you should create a manual system restore point prior to making any alterations to the Registry.
This method will not eliminate – Quick Access from navigation pane.
Expand the following- Registry Editor.
- Type – Regedit in search box that shows up in Start menu,
- Hit – Enter.
- Click on – Yes upon seeing – User Account Control box to start the -Registry Editor.
- Go to below mentioned registry key:
HKEY_CURRENT_USER\SOFTWARE\Microsoft\Windows\CurrentVersion\Explorer\Advanced
Towards right side, search for the entry labelled as-LaunchTo. Double-click it and alter its value to – 0 so that it turns off the Quick Access.
The above mentioned steps are quite easy and help you disable Quick Access.
Follow Us On:Ajit Yadav
Author Bio: Ajit yadav is a professional blogger and co-founder of WindowsClassroom. He is a software engineer by education and blogger & writer by profession.