Forget WiFi Network Windows 10
How to forget WiFi network windows 10: You don’t want to get connected to a WiFi network and want to forget wifi network windows 10? The simple steps mentioned in this article would help you let Windows 10 know that you want it to remove/forget the details of your WiFi connection.
When you are using WiFi network on your Windows 10 device the network profile comprising of network security key, SSID and other details will be automatically created. Once that is done then you can easily connect to your WiFi network in Windows 10 just by selecting the WiFi network automatically.
The only drawback is that your Windows 10 would also save profile of each network even after you wish to discontinue using the connection. Still, there is a solution wherein you can forget/delete the WiFi network using different methods.
Let us learn the steps that would help you delete/forget your WiFi network on your windows 10 via Settings app, command prompt and taskbar.
Table of Contents
Methods to Forget WiFi Network Windows 10
1. Forget WiFi network using Settings App
If you wish to delete the WiFi network configured in the past and connected at present then follow the easy steps given below
- Open- Settings
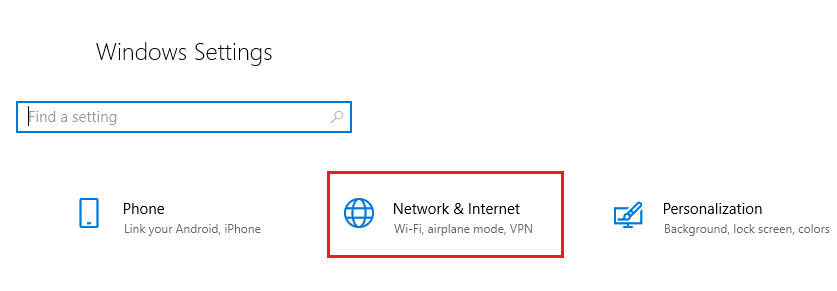
- Click – Network and Internet
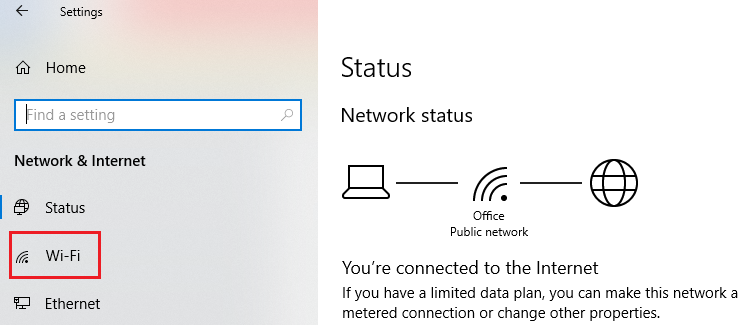
- Click- WiFi
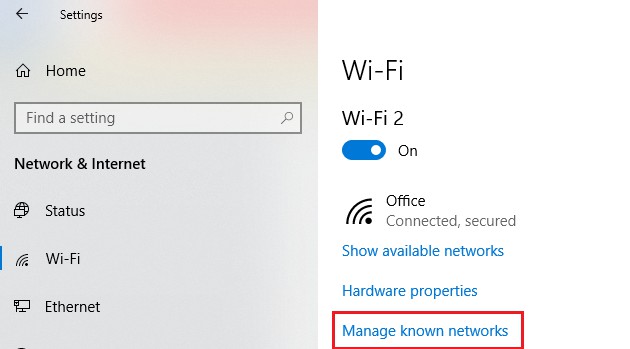
- Click the link – Manage known networks
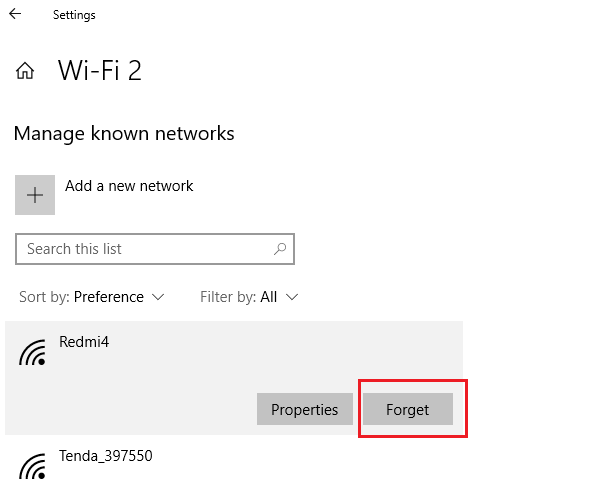
- Choose the network to be removed and then click on the button- Forget
After you successfully complete the steps given above your WiFi network that you selected will be deleted automatically from your device. In case you want to delete a few other networks you can carry out similar steps.
Read also: How to find wifi password on windows 10
2. Forget WiFi network using Taskbar
If you want to remove the Wi-Fi network connection currently in use you can do it by executing the steps as given below
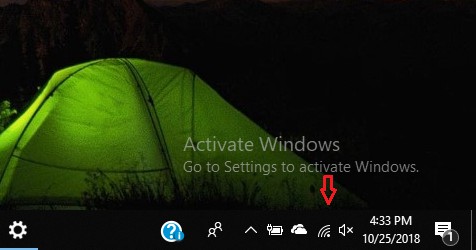
- In notification area you will find wireless icon. Just click on it
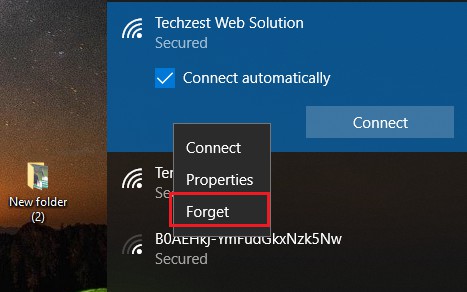
- Right click on the network and click on – Forget
- These two steps will help you remove the network easily.
- The network will no longer be visible
3. Using Command Prompt
Also, netsh command can help you delete the network profiles saved on your PC.
- Open- Start
- Look for – Command Prompt and choose to – Run as administrator
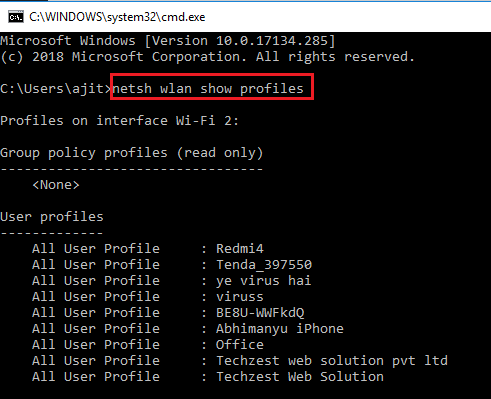
- Now type in the command given below to search for the network and hit enter – netsh wlan show profiles
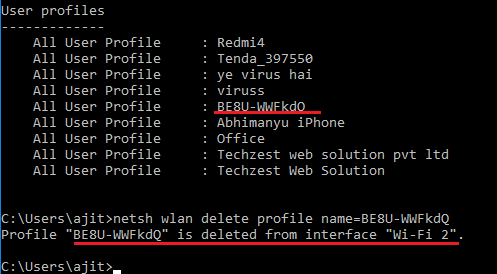
- Now, to delete the wireless network type the following command and hit enter – netsh wlan delete profile name=”WIFI NAME TO REMOVE”
- Once you complete the steps given above successfully, the wireless network will be deleted from your Windows 10 device.
The methods mentioned above will help you successfully remove WiFI network in windows 10 that was configured earlier and in use currently from your Windows 10 PC easily. You can choose any of the above given methods and follow the steps given carefully to execute the process. It will help you delete the wireless network that you do not wish to continue using any more. It is easy and simple to do it on your own.
Follow Us On:

