Windows Memory Diagnostic
Windows Memory Diagnostic Tool: Memory Diagnostics is an inbuilt tool in Windows operating system by which we can check for any memory problems in the device. We can also check the RAM (Random Access Memory) on a computer easily with this windows memory diagnostic tool. Windows memory diagnostic tool is available on Windows 10, 8 and 7.
Let’s learn the simple way to open Windows Memory Diagnostic tool in Windows 10.
Table of Contents
Five Ways to Open Windows Memory Diagnostic in Windows 10
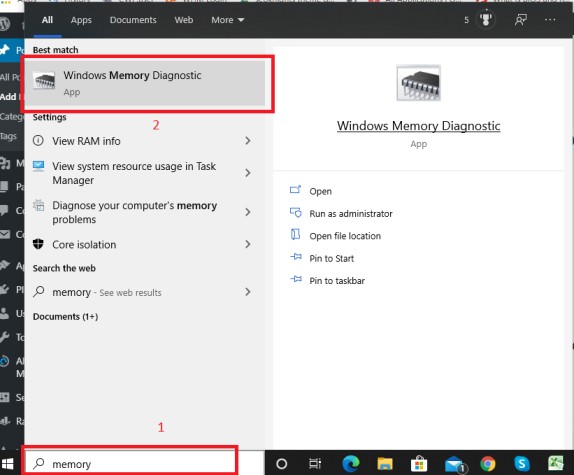
1. By Searching
Step 1- From the Search Box on the Desktop, just type “Memory”
Step 2- Select ‘windows memory diagnostic’
2. Through Run command
Step 1- Open Run by using keys Windows+R
Step 2- Type mdsched and click OK
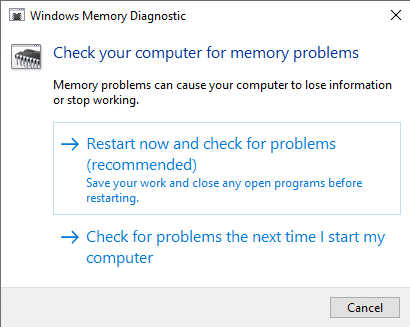
Step 3- Select the option “Restart now and check for the problems” or “Check for problems the next time i start my computer”
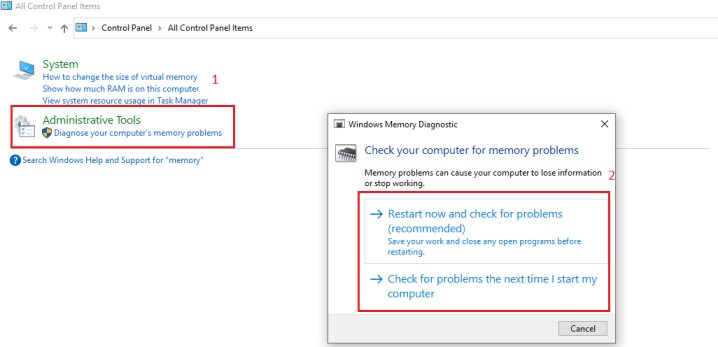
3. Using Control Panel
Step 1- Open Control Panel
Step 2- Enter “Memory” in the top-right box
Step 3- Select ‘Diagnose your Computer’s memory problems” and click on it
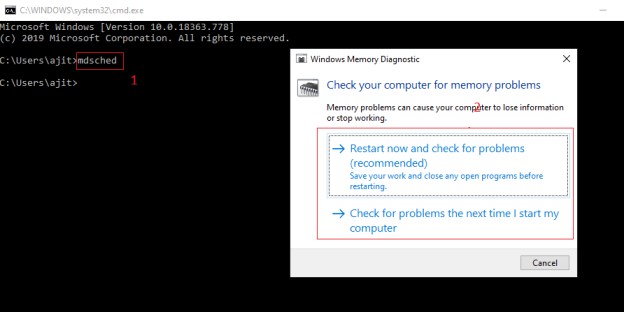
4. Find Windows Memory Diagnostic Via Command Prompt
Step 1- Open the Command prompt by typing “cmd” in the search box on the Desktop
Step 2- Enter mdsched and then press Enter
Step 3- Now select the option “Restart now and check for the problems” or “Check for problems the next time I start my computer”
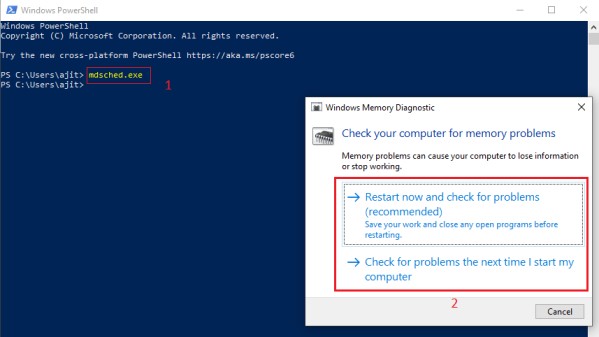
5. By Windows PowerShell
Step 1- Go to Start menu search box and type “powershell” and then click on the Windows PowerShell desktop app
Step 2- Enter mdsched.exe and then press the Enter key
Note: If your PC/laptop is crashing due to failing memory, the Windows Memory Diagnostics tool will automatically detect the same and asks the user to create a scheduled memory test, which happens during the subsequent restart. It is advisable to run the memory test in such cases to determine any memory related issues.
Follow Us On:

