

How to Change Language in Windows 10
How to change language in windows 10: Many Windows 10 users are not aware that it has a default language for the whole system which is basically mentioned while the set up process is going on. Well, this doesn’t mean that you can just use a specific language in case you have a different requirement.
You can easily change windows 10 language using Settings App & Control Panel for the entire system to a language of your choice without the need to re-install your Windows 10 or without thinking about default language while purchasing new machine.
This article will guide you through different steps that help you change language windows 10 all over your computer which includes new and additional accounts too.
Table of Contents
Change language windows 10 using Settings App
In case you end up installing incorrect language or maybe you are in a different location, the Setting App plus Control Panel together can make it simple to change windows 10 language without the need to re-install your operating system- Windows 10.
- Open – Settings
- Click – Time & language option
- Click- Region & Language
- Below “Languages” you will find a button that says – Add a language, just click on that button.
- Now search for the language you prefer to set using the search box.
- Choose the preferred language and then click on – Next button
- Tick the box that says – Set as my Windows display language
- Check other features that you like to install
- Click – Install
- Below the option –“Windows display language” ensure that you select the new language
- Below the option- “Country or region” choose the location you want in case it is not the same as your current location
- You will find an option on the right pane which says – “Administrative language settings”, simply click on the option.
- In the tab – “Administrative” click the button – Copy Settings
- Below – “Copy your current settings to” find and tick the check box that says – Welcome screen and system accounts and New user accounts
- Click – OK
- Again click – Ok
- Restart your machine
Once you complete all the steps given above everything present on your device like Settings, sign-in screen, apps, File explorer, websites etc will make use of the new language set as default.
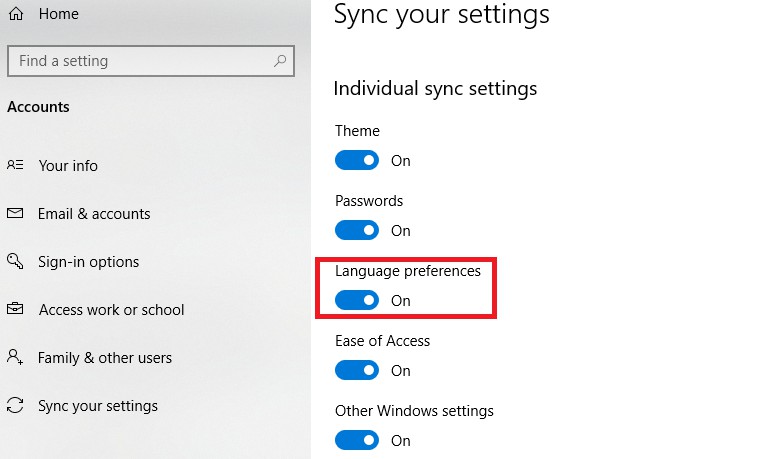
Change windows 10 language: Disable language syncing in Windows 10
If you are using your Microsoft account then the language settings are circulated all across the devices. It means if you decide to change the location and language settings on just one PC, then make sure you disable the sync option follow the steps given below.
- Open- Settings
- Click – Accounts
- Click – Sync your settings
- Turn OFF the toggle switch that says – Language preferences
After you complete the steps mentioned above, you can go ahead and modify the language settings with the help of Settings App.
You can change windows 10 language settings anytime you want following these steps and work in an environment of your preferred language.
Follow Us On:Ajit Yadav
Author Bio: Ajit yadav is a professional blogger and co-founder of WindowsClassroom. He is a software engineer by education and blogger & writer by profession.