Where is Disk Cleanup in Windows 10
Disk Cleanup in Windows 10: The article will help you know about different methods to know where is disk cleanup in Windows 10. Disk cleanup in windows 10 can be utilized regularly to remove the unwanted or junk files present on your drives. It will help vacate the drive space and improve the performance of your PC. It can be used to delete system files as well as temporary files and also files present in recycle bin. You can also remove different files that you do not need anymore.
The new option included in Windows 10 known as system compression in disk cleanup helps compress program files and windows binaries to save drive space on Windows. It is quite helpful especially when there is less space on the hard drive you are using.
Compressing saves a lot of space on the hard drive on Windows 10 and you can easily make out how space would be saved as the details are displayed by disk cleanup. It may reduce the speed of your PC during the process as it takes bit more time to read the files that are compressed on the system.
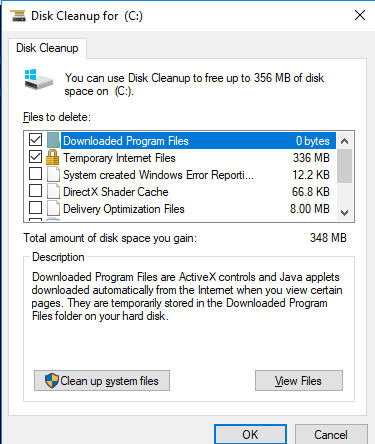
You can get benefited with the feature provided you know how to carry out the process. While running disk cleanup make sure you select the files you want to delete and you will also be able to view the amount of space that would be free on your hard disk after the cleanup process is over. You can select OK once you are sure if you want the selected files to be deleted.
Table of Contents
6 Ways to Find Where is Disk Cleanup in Windows 10
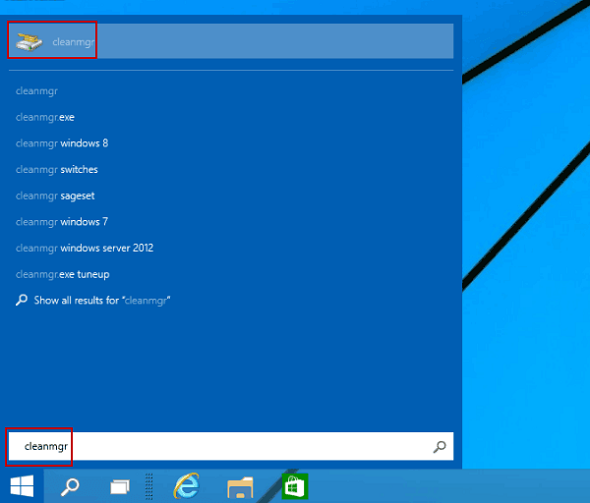
1. Disk cleanup in windows 10 using Search
- Press- Windows Key
- In search box (open it from start button) type – cleanmgr. In results click on – cleanmgr
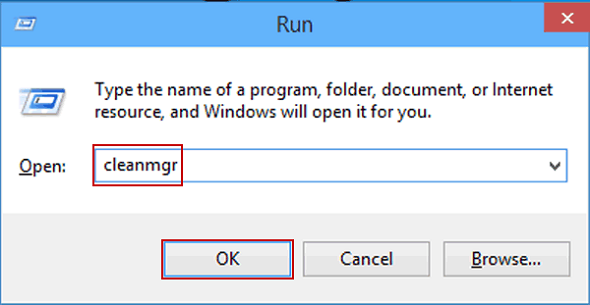
2. Using Run Command
- Open run dialog using Windows+R
- In the box type- cleanmgr and select – OK
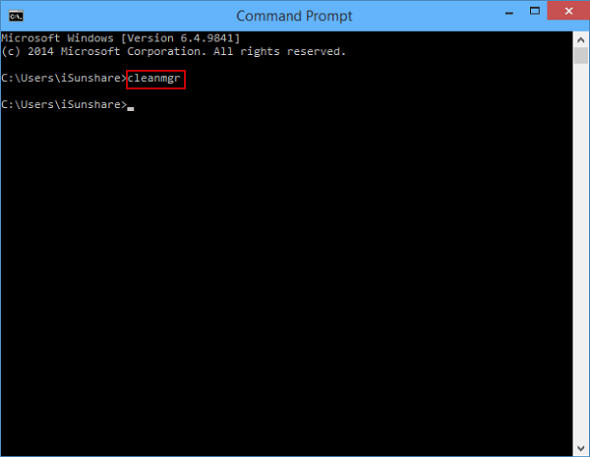
3. Open disk cleanup using Command Prompt
- Open – Command prompt
- In command prompt window type- cleanmgr
- Hit – Enter
Read also: How to partition a hard drive windows 10
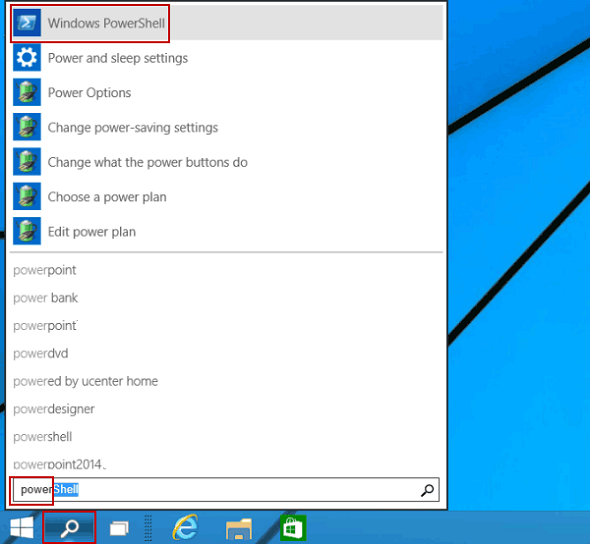
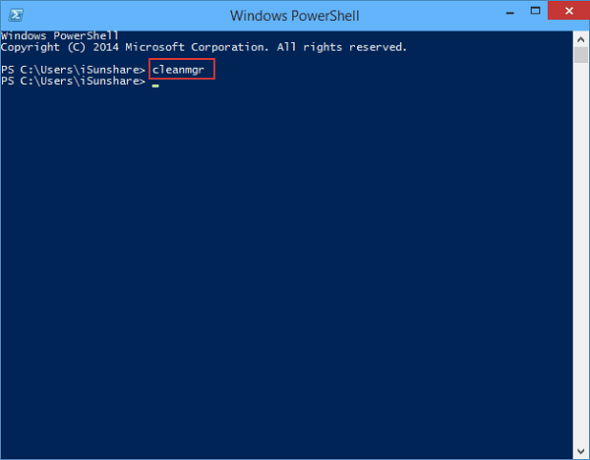
4. Find where is disk cleanup in windows 10 using Powercell
- On search button found on taskbar in the empty box, type- Power
- Click on – Windows powershell and it will open
- Type – cleanmgr and press – Enter
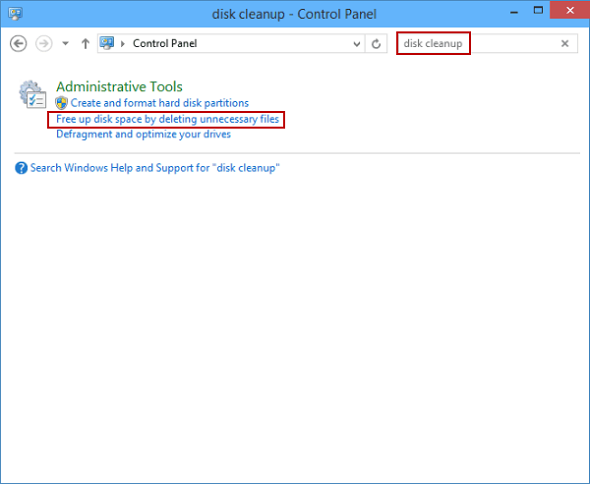
5. Using Control Panel
- Open – Control panel
- In the search box towards top right type – Disk cleanup
- Press – Free up disk space by deleting unnecessary files.
6. Using Administrative Tools
- From administrative tools – open – Disk cleanup
- Click on start button towards left and then type – Administrative and press – Administrative tools located above start menu
- Search for – Disk cleanup in the listed tools and double click it
It is always recommended that you run disk cleanup regularly on your system to remove the clutter that reduces the speed of your PC. When done regularly you won’t face problems related to slow speed etc. Over a period of time files that are stored on your PC which you tend to forget to delete consume a lot of your disk space thereby affecting the speed of your computer. It is not possible to delete them often but you can run disk clean up to do the job.
Follow Us On:
Keep up the wonderful piece of work, I read few posts on this website and I believe that your site is very
interesting and holds sets of wonderful info.