

Graphics Driver Update
Graphics Driver Update: Every image that you see on your computer screen is only because of the video driver or graphics driver, which is nothing but a system software that makes your graphic card function. You need to update graphics driver on Windows 10 regularly in order to avoid any kind of video or display issues. It even helps to enhance your game performance on your PC, full resolutions or color depths. For amazing visual experience, smooth performance, and support for external displays, users look for new updates for graphics drivers.
Table of Contents
Ways for Graphic Driver Update
Let’s look at multiple ways to update the graphics driver.
1. Using Windows Update
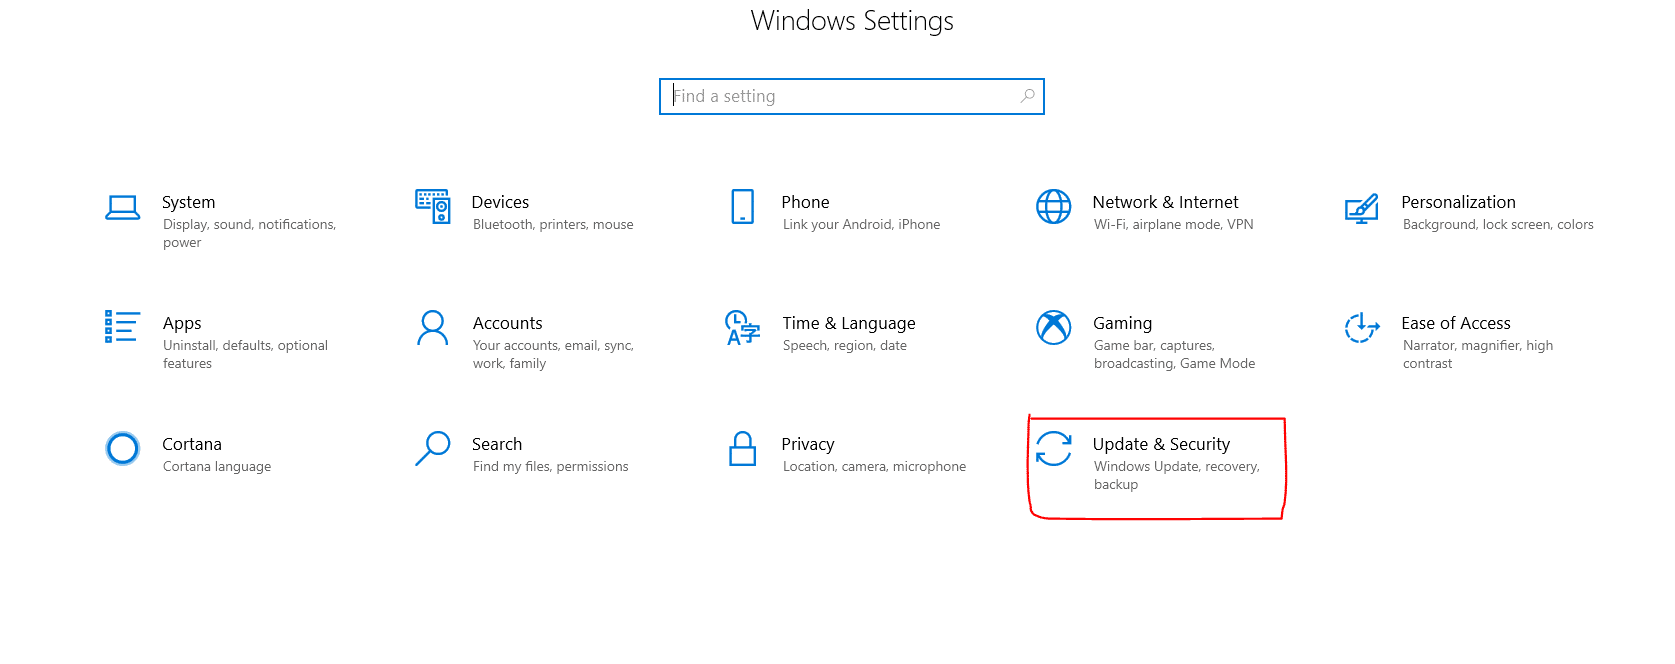
- Open Start Menu
- In the new window, select Update and Security.

- The user can click on Check for updates in the next window.
2. Manually Update with Windows Device Manager
Most of the times, the Windows Update may not identify a new driver. Users have to manually look for options to upgrade the Graphics Drivers on Windows 10. The companies that manufacture Graphics Drivers generally release monthly updates on bug fixes and enhancement of performances. But, users do not get such quick updates as it takes time to pass through Microsoft Certification Process, in case a company applies for it.
If your Graphics Driver is three to four months old, you can update it with Windows Device Manager on Windows 10. It is imperative to create backups before updating the graphics drivers. By creating a backup recovery point, the user can backup all the drivers on Windows 10. In case the update disrupts, it allows a user to return to the previous stable state. First follow these steps to create a restore point –
- Right-click on the Computer icon which is named This PC on the desktop. Then, select Properties.
- On the left, click on System Protection.
- Next, click on Create where it says “Create a restore point right now…”
After creating the system backup, it’s safe to start the update process manually with Windows Device Manager on Windows 10 –
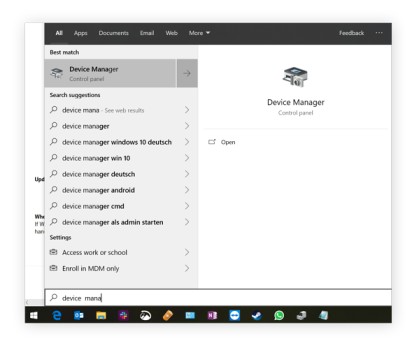
- On Start Menu, type “Device Manager” in the search bar.

- Click on the result Device Manager. When a list appears, search for terms under Display adaptors related to graphics cards such as Standard VGA Controller, graphics, Intel Graphics, NVIDIA GE Force, AMD Radeon, or any other brand name.
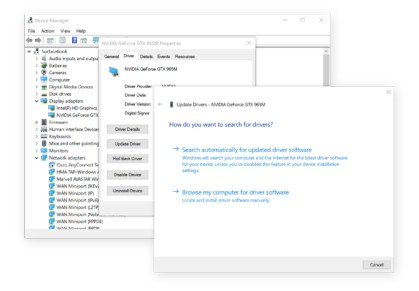
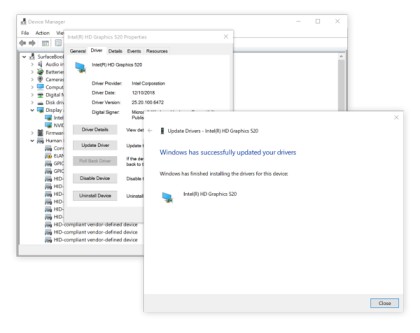
- Double-click on the graphic card option. As the dialog box opens, click on the Driver
- Next, click on the second option “Update Driver”.
- In the next window, click on “Search automatically for updated driver software”. It finds updates for your installed graphic drivers.

- If it is unable to find an update for you, repeat 1-3 times. If still it doesn’t find, click on the next option “Browse my computer for driver software”.
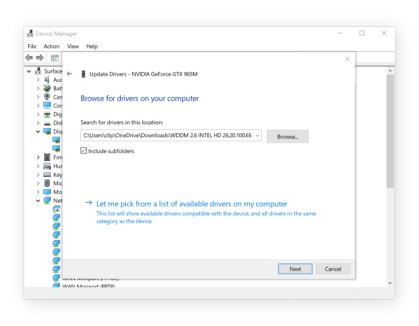
- If in case, you choose the second option, you need to manually choose a driver. Generally, computers use either of these three graphics drivers: Intel HD Graphics, AMD Radeon, or NVIDIA Drivers.
- As you browse, select if you find the driver in the setup folder. If you are not able to find it, search for a file ending .INF in the Downloads folder. Users should click on “Let me pick from a list of available drivers on my computer.” Click Next.

- Click on Have Disk > Browse. Now, browse the folder that stores the driver.

- To install the driver, click on Next. In the next window, you may read a message “Windows has successfully updated your drivers”. It indicates that it has finished the installation of the driver with the latest updates.
Post the update process, you can learn about the new features and settings installed. Right-click on Windows Desktop to search for Intel HD Graphic options, NVIDIA Control Panel or AMD Radeon settings to know more about the new updates.
Note: Rarely, some users choose the wrong graphics chipset. To rectify follow these steps. It generally happens with the “NIVIDA Optimus” chipset.
- Right-click on desktop and select NVIDIA Control Panel.
- Now on the left pane, select “Manage 3D settings”.
- Select on “Program Settings” from the next window.
- Click “Add”
- Go to the “Algodoo” folder, select Algodoo.exe and click “Open”
- Next it displays “Select the preferred graphics processor for this program”. Drop down and click ‘High-performance NVIDIA processor”.
- Select “Apply”.
3. Update from the Manufacturer’s website
If the above steps do not work, the last resort for the user is to directly download the drivers from the hardware vendor. Look for names in the section “Display adapters” under Device Manager.
The links are given below for different graphic drivers manufacturers.
For NVIDIA, go to www.nvidia.com
For ATI, go to www.amd.com
For INTEL, go to www.intel.com
Follow Us On:Ajit Yadav
Author Bio: Ajit yadav is a professional blogger and co-founder of WindowsClassroom. He is a software engineer by education and blogger & writer by profession.